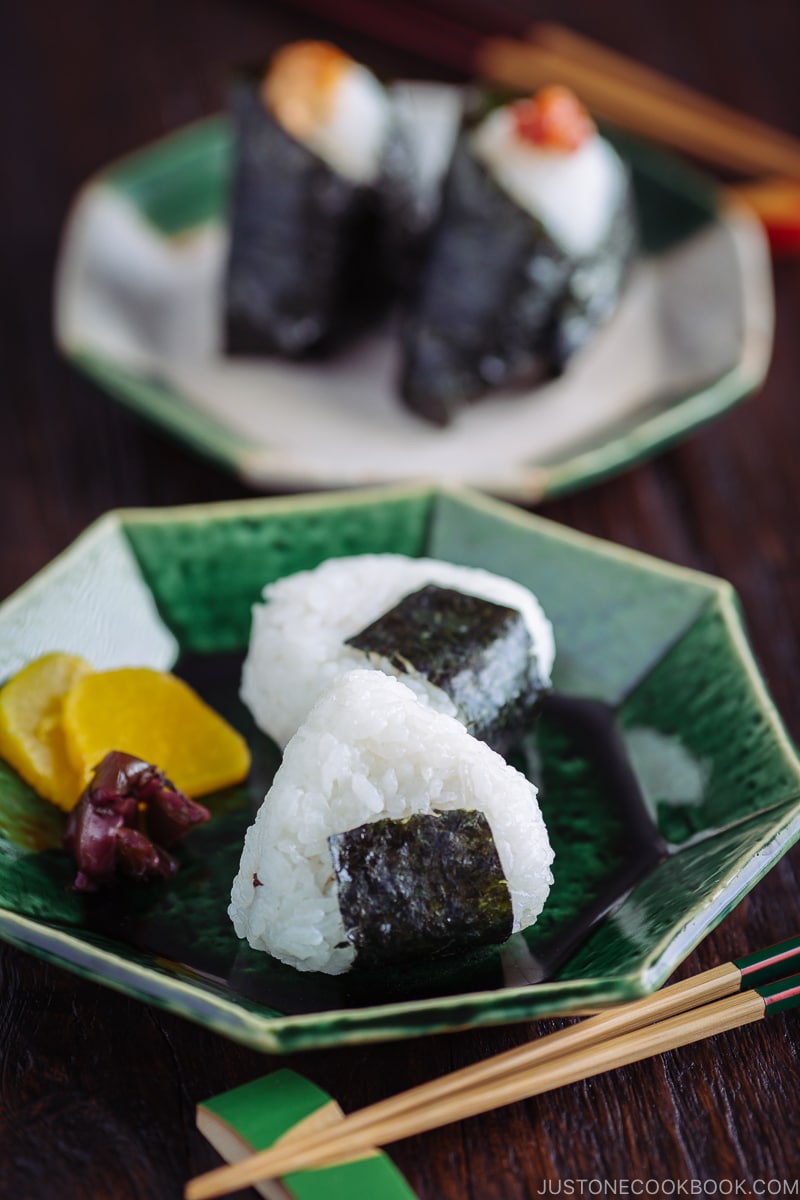
Stuffed with a variety of fillings and flavors, Onigiri, or Japanese rice balls, make an ideal quick snack and are a fun alternative to sandwiches for lunch. In this recipe, you’ll learn how to make onigiri using common ingredients for rice balls in Japan.
Servings: 12 onigiri
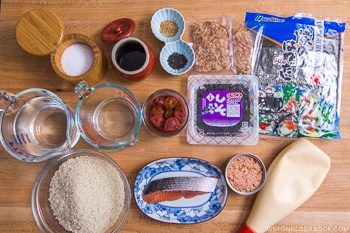
Ingredients
For the Steamed Rice
- ▢ 2 cups uncooked Japanese short-grain rice
- ▢ 2½ cups water
For the Onigiri
- ▢ kosher salt (Diamond Crystal; use half for table salt)
- ▢ 4 sheets nori (dried laver seaweed)
- ▢ Japanese Salted Salmon (homemade or store bought) (recipe follows; see my Japanese Salted Salmon recipe post for more details)
- ▢ okaka (recipe follows)
- ▢ tuna mayo (recipe follows)
- ▢ 3 umeboshi (Japanese pickled plum)
- ▢ seasoned kombu (prepared)
- ▢ toasted white and black sesame seeds (to garnish)
For the Japanese Salted Salmon (Quick Version)
- ▢ 1 fillet salmon
- ▢ kosher salt (Diamond Crystal; use half for table salt)
For the Okaka
- ▢ ⅔ cup katsuobushi (dried bonito flakes)
- ▢ 2 Tbsp soy sauce
For the Tuna Mayo
- ▢ ½ (5-ounce) can albacore tuna (preferably packed in olive oil) (2.5 oz, 70 g)
- ▢ 2 Tbsp Japanese mayonnaise
- ▢ ½ Tbsp soy sauce
Japanese Ingredient Substitution: If you want substitutes for Japanese condiments and ingredients, click here.
Instructions
- Gather all the ingredients.
To Prepare the Steamed Rice
- You can also cook short-grain rice with a rice cooker, Instant Pot, or donabe.
- Put the rice in a large bowl and gently wash the rice in a circular motion and discard the water. Repeat this process about 3-4 times.
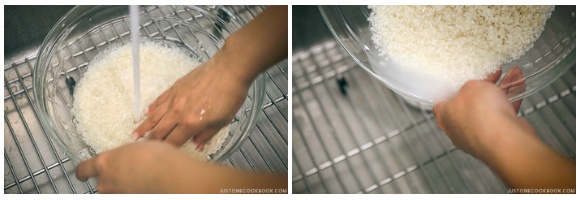
- Let the rice soak in water for 30 minutes. Transfer the rice to a sieve and drain it completely for at least 15 minutes.

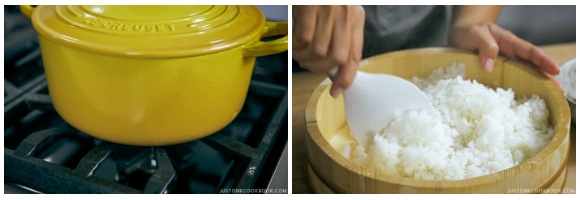
- Combine the rice and measured water in a heavy-bottomed pot. I recommend a heavy-bottomed pot with a tight-fitting lid as it is thicker at the base so it maintains and distributes heat better. Cover the pot with the lid and bring it to a boil over medium heat.
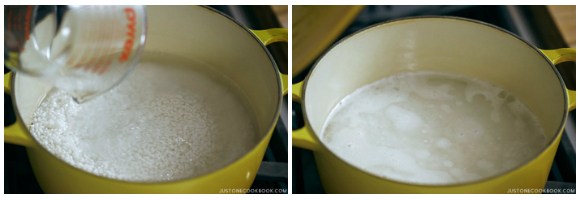
- Once the water is boiling, turn the heat to the lowest setting and continue to cook covered for 12 to 13 minutes, or until the water is completely absorbed. At the 12- to 13-minute mark, take a quick peek; if there is any water left, close the lid and continue cooking for another minute or so.

- Remove the pot (with the lid on) from the heat and let it steam for another 10 minutes. Then, remove the lid and transfer the rice to a large plate or baking sheet lined with parchment paper (I use a sushi oke). Fluff the rice with a rice paddle. Let the hot rice cool until it’s warm and you can hold the rice without burning your hands. However, do not let the rice completely cool down.
To Prepare the Onigiri Fillings
- While the rice is draining and soaking (45 minutes), prepare the onigiri fillings.
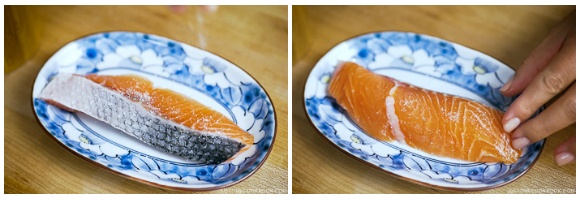
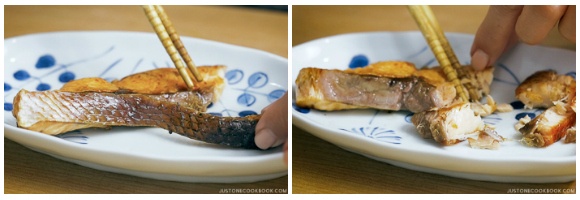
- Japanese Salted Salmon Filling: Sprinkle kosher salt on both sides of the salmon fillet. Bake at 425ºF (218ºC) in a toaster oven or standard oven for 10-20 minutes. Japanese salted salmon is cooked until well done (you want it dry and flaky).
- Break the cooked salmon into flakes and set aside.
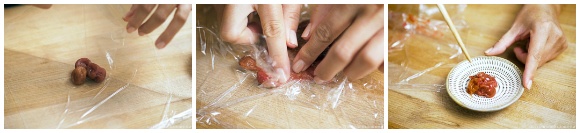
- Umeboshi Filling: Place the umeboshi (Japanese pickled plums) on a 10-inch by 10-inch (25 cm x 25 cm) sheet of plastic wrap. Fold the plastic wrap in half over the umeboshi and squeeze the seed out from each umeboshi. Discard the seeds and put the umeboshi flesh on a small plate.
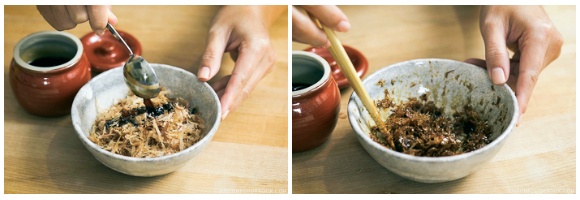
- Okaka Filling: Put the katsuobushi (dried bonito flakes) in a bowl and add the soy sauce. Mix to combine. The katsuobushi should be moistened but not drenched in soy sauce.
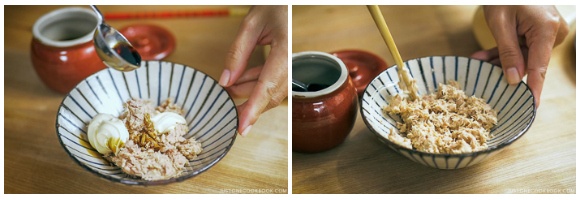
- Tuna Mayo Filling: Put the drained canned tuna in a bowl and add the Japanese mayonnaise and soy sauce. Mix to combine.
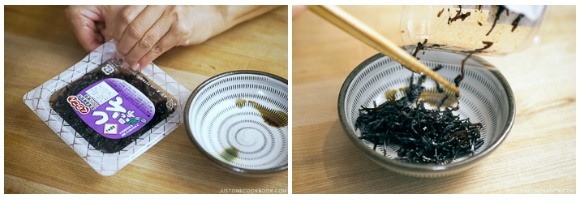
- Seasoned Kombu Filling: Put the prepared seasoned kombu in a bowl for easy access later.
To Make the Onigiri
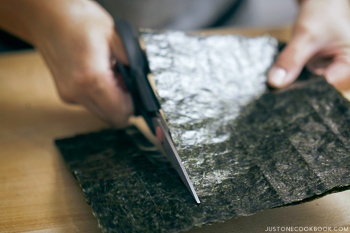
- See the alternative method below if you plan on serving the onigiri later or packing for lunch. Cut the nori sheets into thirds.
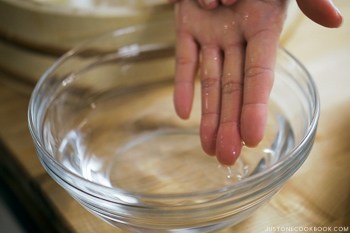
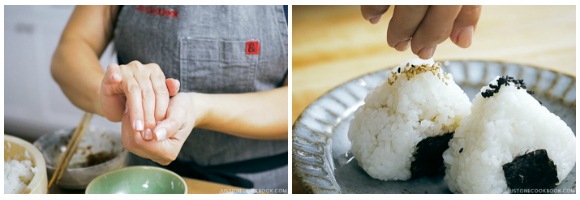
- First, wet both of your hands with water to prevent the rice from sticking to your hands.
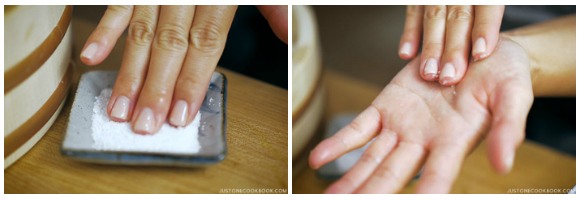
- Then put some salt in your hand and rub to spread it on your palms. How much salt? I dip three fingertips in kosher salt as pictured below. If you are using table salt, use half the amount as it’s saltier than kosher salt.
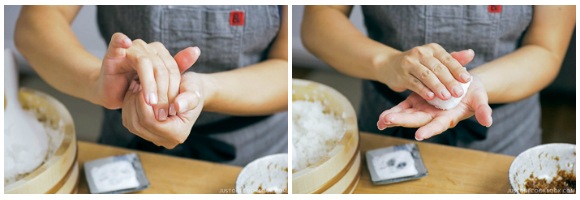
- Scoop a handful of warm rice (about ⅓ cup) into one hand. Create a small well (indentation) in the center of the rice. Put one kind of filling (about 1-2 tsp) inside. Then mold the rice with your hands around the well to cover your filling completely.

- Gently press the rice around the filling to form the rice into a triangle. I use three fingers (thumb, index finger, and middle finger) to make a triangle corner. Your hands should be just firm enough so the onigiri doesn’t fall apart. You don’t want to squeeze the rice too tightly.
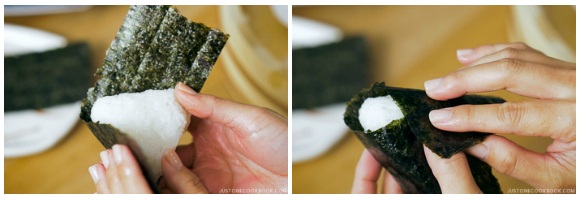
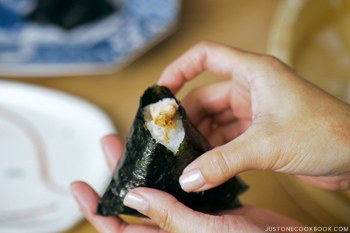
- Wrap the onigiri with a piece of nori seaweed. If you like the crispy nori, wrap it with nori right before consuming the onigiri. Make sure to keep the nori in an airtight container or bag so it will not get stale.
- Place a little bit of each filling on the tip of the onigiri so you can identify which filling is inside.
Alternative Method of Making the Onigiri
- Use this method when you are serving onigiri for later or packing for lunch. Place a piece of plastic wrap in a rice bowl (or any small bowl) and put the rice on top. Sprinkle some kosher salt (remember, salt is used here to preserve the rice for a long time). If you like to add a filling, create a small well (indentation) in the center of the rice. Put one kind of filling (about 1-2 tsp) inside.
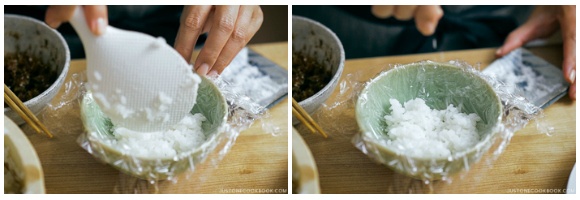
- Gather the corners of the plastic wrap and twist the plastic a few times to tighten it around the rice.

- Form the rice into a triangle shape in the same manner that I described above.
To Serve
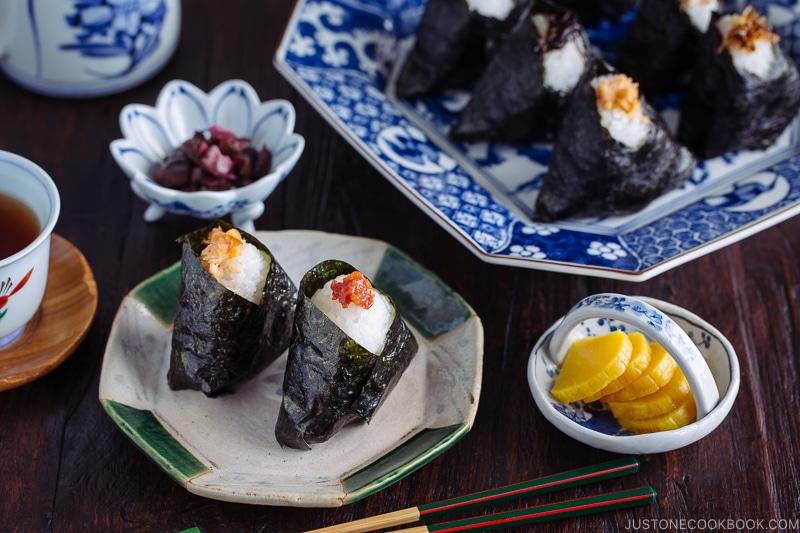
- Enjoy onigiri warm or at room temperature.
To Store
- If you like to pack for your lunch, keep it cool and consume it within 6 hours. Onigiri (or any rice dish) gets hard when you refrigerate it. The cold air makes the rice dry and hard, which is perfect for fried rice. I don’t recommend making onigiri ahead of time. But if you really need to, my trick is to wrap the onigiri with thick kitchen towels and store it in the fridge. The onigiri will be cool and safe but should not get cold.
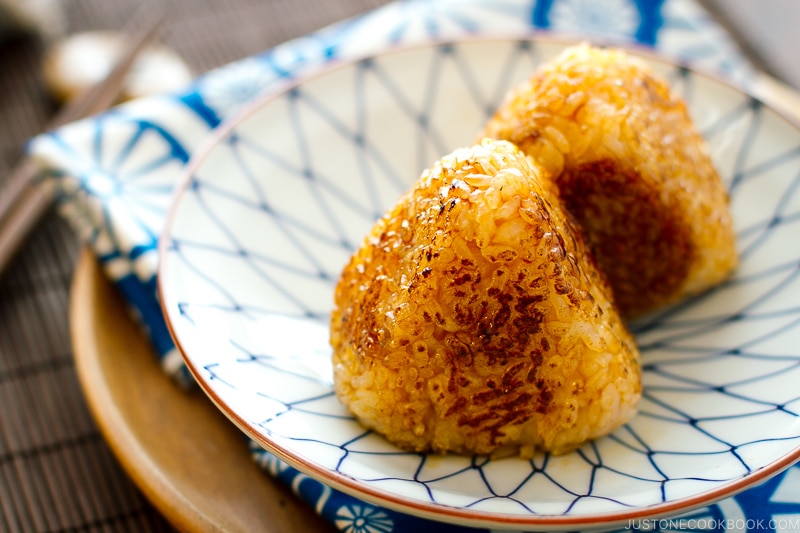
- If your onigiri has dried out a bit, you can grill it in a frying pan and baste it with soy sauce to make yaki onigiri.
From: Just One Cookbook
